
리스트들이 나오는걸 확인했다.
이제 그 리스트들을 추가해 줄 수 있도록 해주는 화면을 만들어봅시다!

첫번째로 텍스트를 입력받을 컴포넌트와 그걸 추가하는 버튼 내지 엔터키가 필요합니당
그러기 위해 다음코드를 입력하여 생성해주도록 합니다!
그리고 해당 기능을 위해 TodoAdd라는 js파일을 하나더 생성했습니다!
import React from "react";
import { TextField, Paper, Button, Grid } from "@material-ui/core";

class AddTodo extends React.Component {
  constructor(props) {
    super(props);
    this.state = { item: { title: "" } };
  }
  render() {
    return (
      <Paper style={{ margin: 16, padding: 16 }}>
        <Grid container>
          <Grid xs={11} md={11} item style={{ paddingRight: 16 }}>
            <TextField
              placeholder="Add Todo here"
              fullWidth/>
          </Grid>
          <Grid xs={1} md={1} item>
            <Button fullWidth color="secondary" variant="outlined">+</Button>
          </Grid>
        </Grid>
      </Paper>
    );
  }
}

export default AddTodo;
그리고 App.js에 해당 컴포넌트를 추가해 줍시당
import React from 'react';
import Todo from './Todo';
import AddTodo from './AddTodo';
import { Paper, List }  from "@material-ui/core";
import './App.css';

class App extends React.Component{
  constructor(props){
    super(props);
    this.state={
       items : [
       { id : "unoKim", title : "안녕하세요 반갑습니다!!", done:true },
       { id : "gdHong", title : "날씨가 춥습니다. 감기조심하세요!", done:false },
        ],
      };
  }
render() {
  var todoItems = this.state.items.length > 0 && (
    <Paper style={{ margin: 16 }}>
      <List>
          <AddTodo/>
      {this.state.items.map((item, idx) => (
          <Todo item={item} key={item.id} />
          ))}
        </List>
      </Paper>
    );
    return <div className="App">{todoItems}</div>;
  }
}


export default App;
맨위에 임포트를 해주고~! 그다음 중간 렌더 부분에 <AddTodo/>만 넣어주었습니다.!

그럼 예쁜유아이가 나옵니다.

이제 추가되는 핸들러를 추가해주어야합니다.
1. 사용자는 Todo를 추가하려고 입력을 함
2. 그 정보들은 어딘가 저장이 됨
3. +버튼을 누르면 리스트에 추가가된다.
총 3가지의 이벤트를 구현해주도록 합시다!
- onInputChange : 사용자가 input필드에 키를 하나 입력할 때마다 실행되며 input필드에 담긴 문자열을 js오브젝트에 저장한다.
- onButtonClick : 사용자가 + 버튼을 클릭할 때 실행되며 onInputChange에서 저장하고있던 문자열을 리스트에 추가한다.
- enterKeyEvenHandler : 사용자가 input필드 상에서 엔터 또는 리턴키를 눌렀을 때 실행되며 기능은 onButtonClick과 같습니다.
총 이걸이용해서 작성해보겠습니다!!
import React from "react";
import { TextField, Paper, Button, Grid } from "@material-ui/core";

class AddTodo extends React.Component {
  constructor(props) {
    super(props);
    this.state = { item: { title: "" } };
  }
  onInputChange = (e) =>{
    const thisItem =  this.state.item;
    thisItem.title = e.target.value;
    this.setState({item: thisItem});
    console.log(thisItem);
  }
  render() {
    return (
      <Paper style={{ margin: 16, padding: 16 }}>
        <Grid container>
          <Grid xs={11} md={11} item style={{ paddingRight: 16 }}>
            <TextField
              placeholder="Add Todo here"
              fullWidth
              onChange={this.onInputChange}
              value = {this.state.item.title}
              />
          </Grid>
          <Grid xs={1} md={1} item>
            <Button fullWidth color="secondary" variant="outlined">+</Button>
          </Grid>
        </Grid>
      </Paper>
    );
  }
}

export default AddTodo;
한글자 한글자 들어올떄마다 콘솔로그가 찍히도록했습니다. 한번
f12를 누르고 콘솔을 확인해보겠습니닷!!

한글자한글자 모두 찍여서 title이라는 컴포넌트에 저장됩니다.
두번째로 + 버튼을 눌렀을때 추가되도록 해보겠습니다!!
addTodo 컴포넌트는 상위 컴포넌트의 items에 접근할 수 없고 app컴포넌트가 items를 관리하기 때문에
리스트에 추가하기위해서는 App 컴포넌트에 추가를 해주어야합니다!!
add = (item) => {
  const thisItems = this.state.items;
  item.id = "ID-" + thisItems.length;
  item.done = false;
  thisItems.push(item);
  this.setState({items:thisItems});
  console.log("items : " + this.state.items);
}
app컴포넌트에 추가해주었으면, 그것을 아래 단계인 addTodo에서 사용할 수 있도록
해당함수를 받아 사용할수 있게해줍시다!
import React from "react";
import { TextField, Paper, Button, Grid } from "@material-ui/core";

class AddTodo extends React.Component {
  constructor(props) {
    super(props);
    this.state = { item: { title: "" } };
  }
  onInputChange = (e) =>{
    const thisItem =  this.state.item;
    thisItem.title = e.target.value;
    this.setState({item: thisItem});
  }
  onButtibClick = () =>{
    this.AddTodo(this.state.item);
    this.setState({item: {title: ""} });
  }

  render() {
    return (
      <Paper style={{ margin: 16, padding: 16 }}>
        <Grid container>
          <Grid xs={11} md={11} item style={{ paddingRight: 16 }}>
            <TextField
              placeholder="Add Todo here"
              fullWidth
              onChange={this.onInputChange}
              value = {this.state.item.title}
              />
          </Grid>
          <Grid xs={1} md={1} item>
            <Button fullWidth color="secondary" variant="outlined" onclick={this.onButtibClick}>+</Button>
          </Grid>
        </Grid>
      </Paper>
    );
  }
}

export default AddTodo;
이미 상속받은 내용이니 onButtonClick을 간단하게 해당 값정도만 입력된다 정도까지만 써줍니다!
그리고 버튼필드에 해당 함수를 넣어줍니다!
그리고 버튼외에도 엔터키를 누르면 아이템이 추가되도록 하기위해서 이벤트를 하나더 addTodo에 넣어줍시다!
  enterKeyEventHandler = (e)  => {
    if(e.key==="Enter"){
      this.onButtibClick();
    }
  }
만약 엔터키가 눌린다면 버튼 클릭처리가 되도록 했습니다!
onKeyPress={this.enterKeyEventHandler}그리고 제일 중요한게 텍스트 필드 필드에 해당 코드를 넣어주어야합니다.
의미로는 키가눌렸을때 = 엔터키이벤트팬들러 함수를 호출(이건 또 add하는 함수를 호출함)
이렇게 순차적으로 착착착 됩니다!!
import React from "react";
import { TextField, Paper, Button, Grid } from "@material-ui/core";

class AddTodo extends React.Component {
  constructor(props) {
    super(props);
    this.state = { item: { title: "" } };
    this.add = props.add;
  }
  onInputChange = (e) => {
    const thisItem =  this.state.item;
    thisItem.title = e.target.value;
    this.setState({item: thisItem});
  }
  onButtonClick = () => {
    this.add(this.state.item);
    this.setState({ item: { title: "" } });
  };

  enterKeyEventHandler = (e) => {
    if (e.key === "Enter") {
      this.onButtonClick();
    }
  };
  render() {
    return (
      <Paper style={{ margin: 16, padding: 16 }}>
        <Grid container>
          <Grid xs={11} md={11} item style={{ paddingRight: 16 }}>
          <TextField
              placeholder="Add Todo here"
              fullWidth
              onChange={this.onInputChange}
              value={this.state.item.title}
              onKeyPress={this.enterKeyEventHandler}
            />
          </Grid>
          <Grid xs={1} md={1} item>
            <Button fullWidth color="secondary" variant="outlined" onclick={this.onButtibClick}>+</Button>
          </Grid>
        </Grid>
      </Paper>
    );
  }
}

export default AddTodo;
이제 엔터키든 추가버튼을 어떤걸 눌러도 추가가됩니다.!!!

삭제 기능 구현
삭제기능을 구현하기전 리스트 아이템의 오른쪽에 삭제 아이콘을 추가해서 아이콘이 눌리면 삭제가 되도록
만들어봅시다!
해당 리스트가 나타나는 곳은 Todo.js이곳이니 여기에 해당 아이콘이 나타나도록 하겠습니다!!
import React from 'react';
import {ListItem, ListItemText, InputBase, Checkbox, ListItemSecondaryAction, IconButton
} from "@material-ui/core";
import { DeleteOutline } from '@material-ui/icons';

class Todo extends React.Component{
    constructor(props) {
        super(props);
        this.state = { item: props.item};
      }

    render(){
        var item = this.state.item;
        return (
            <ListItem>
                <Checkbox checked={item.done}/>
                <ListItemText>
                <InputBase
                inputProps={{ "aria-label":"naked"}}
                type="text"
                id={item.id}
                name={item.id}
                value={item.title}
                multiline={true}
                fullWidth={true}
                />
                </ListItemText>
                <ListItemSecondaryAction>
                    <IconButton aria-label="Delete Todo">
                            <DeleteOutline/>
                    </IconButton>
                </ListItemSecondaryAction>
            </ListItem>
        );
    }
}
export default Todo;
추가된것은 <리스트아이템> 사이이에 <리스트아이템세컨더리액션>과 <아이콘버튼 - 삭제> 이것을 추가하시면
됩니다!!
이제 이 아이콘에 함수를 부여해 줍시다!
이것은 add과 같이 APP.js에 추가해주셔야해요!
delete = (item) => {
  const thisItems = this.state.items;
  console.log("Before Update Items : ", this.state.itmes)
  const newItems = thisItems.fitter(e => e.id !== item.id);
  this.setState({items: newItems }, ()=> {
    console.log("Update Items : " , this.state.items)
  });
}
조금 다르게 기존 itmes에서 매개변수로 넘어온 item을 제외한 새 items를 state에 저장하는 것입니다.
매개변수로 넘어온 item을 제외하려고 fiter() 함수를 사용했고 id를 비교해 item과 id가 같을때 제외하는
로직으로 작성했습닏!
render() {
  var todoItems = this.state.items.length > 0 && (
    <Paper style={{ margin: 16 }}>
      <List>
          <AddTodo add={this.add}/>
          {this.state.items.map((item, idx) => (
            <TodoList item={item} key={item.id} delete={this.delete} />
          ))}
        </List>
      </Paper>
    );
    return <div className="App">{todoItems}</div>;
  }
}
그래고 랜더값은 위처럼 했습니다.
딜리트 함수를 실행할수있도록 등록한것입니다.
그리고 Todo.js에서도 delete() 함수를 연결해주어야헤요!!
그래서 총 app.js는
import React from 'react';
import TodoList from './TodoList';
import AddTodo from './AddTodo';
import { Paper, List, Container }  from "@material-ui/core";
import '../css/App.css';

class App extends React.Component{
  constructor(props){
    super(props);
    this.state={
       items : [],
      };
  }
add = (item) => {
  const thisItems = this.state.items;
  item.id = "ID-" + thisItems.length;
  item.done = false;
  thisItems.push(item);
  this.setState({items:thisItems});
  console.log("items : " + this.state.items);
}
delete = (item) => {
  const thisItems = this.state.items;
  console.log("Before Update Items : ", this.state.itmes)
  const newItems = thisItems.filter(e => e.id !== item.id);
  this.setState({items: newItems }, ()=> {
    console.log("Update Items : " , this.state.items)
  });
}

render() {
  var todoItems = this.state.items.length > 0 && (
    <Paper style={{ margin: 16 }}>
    <List>
      {this.state.items.map((item, idx) => (
        <TodoList item={item} key={item.id} delete={this.delete} />
      ))}
    </List>
  </Paper>
);
    return (
      <div className="App">
        <Container maxWidth="md">
          <AddTodo add={this.add} />
          <div className="TodoList">{todoItems}</div>
        </Container>
      </div>
    );
  }
}


export default App;
addTodo.js
import React from "react";
import { TextField, Paper, Button, Grid } from "@material-ui/core";

class AddTodo extends React.Component {
  constructor(props) {
    super(props);
    this.state = { item: { title: "" } };
    this.add = props.add;
  }
  onInputChange = (e) => {
    const thisItem =  this.state.item;
    thisItem.title = e.target.value;
    this.setState({item: thisItem});
  }
  onButtonClick = () => {
    this.add(this.state.item);
    this.setState({ item: { title: "" } });
  };

  enterKeyEventHandler = (e) => {
    if (e.key === "Enter") {
      this.onButtonClick();
    }
  };
  render() {
    return (
      <Paper style={{ margin: 16, padding: 16 }}>
        <Grid container>
          <Grid xs={11} md={11} item style={{ paddingRight: 16 }}>
          <TextField
              placeholder="Add Todo here"
              fullWidth
              onChange={this.onInputChange}
              value={this.state.item.title}
              onKeyPress={this.enterKeyEventHandler}
            />
          </Grid>
          <Grid xs={1} md={1} item>
            <Button fullWidth color="secondary" variant="outlined" onClick={this.onButtonClick}>+</Button>
          </Grid>
        </Grid>
      </Paper>
    );
  }
}

export default AddTodo;
Todo.js
import React from 'react';
import {ListItem, ListItemText, InputBase, Checkbox, ListItemSecondaryAction, IconButton
} from "@material-ui/core";
import { DeleteOutline } from '@material-ui/icons';

class TodoList extends React.Component{
    constructor(props) {
        super(props);
        this.state = { item: props.item};
        this.delete = props.delete;
      }
      deleteEventHandler = () => {
        this.delete(this.state.item);
      };
      render(){
        var item = this.state.item;
        return (
            <ListItem>
                <Checkbox checked={item.done}/>
                <ListItemText>
                <InputBase
                inputProps={{ "aria-label":"naked"}}
                type="text"
                id={item.id}
                name={item.id}
                value={item.title}
                multiline={true}
                fullWidth={true}
                />
                </ListItemText>
                <ListItemSecondaryAction>
                    <IconButton aria-label="Delete Todo"
                    onClick = {this.deleteEventHandler}>
                            <DeleteOutline/>
                    </IconButton>
                </ListItemSecondaryAction>
            </ListItem>
        );
    }

}
export default TodoList;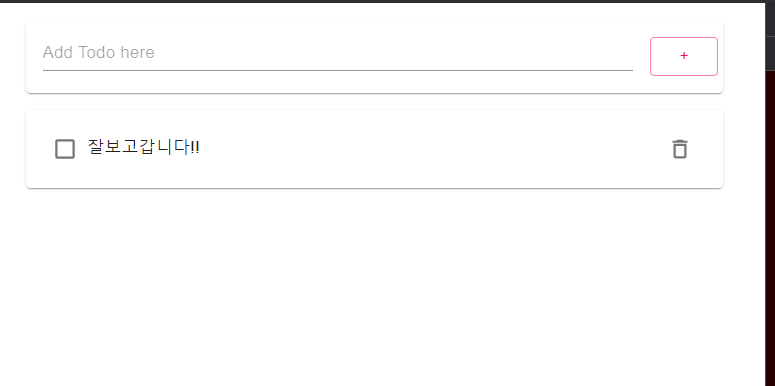
'Spring boot 프로젝트 기록 > 2. 프론트엔드 개발' 카테고리의 다른 글
| 로그인 컴포넌트 (0) | 2021.12.14 |
|---|---|
| 서비스통합(백엔드와 프론트엔드 통합하기) (0) | 2021.12.01 |
| Todo 수정 (0) | 2021.12.01 |
| 리액트로 간단한 컴포넌트 만들어보기 (0) | 2021.11.30 |
| Node.js와 NPM설치 (0) | 2021.11.29 |


댓글